Thursday, February 19, 2015

Friendships, Old & New


I have been pondering the importance of my friendships with women lately...good ones that span decades are so rare in our day and age, and I treasure those that have stood the test of time. And I'm not talking about my Facebook friendships. Real ones. Ones that sit and cry with you when you suffer loss or are struggling. Ladies that rejoice with you when good things happen in your family. Friends that are on the same page in life, marriage, faith and family. God has given me several people like this and each one is a treasure to be carefully guarded. My friend Becca is one of these people. She has TEN kids, is a gifted wife, mom and friend to many. (You can have a lovely peek into how she does it here.) Her oldest daughter and my youngest daughter are besties for life. They are both in college now, and Becca and I miss our girls all the time...they have become our good friends as they have matured.

Ellie, Mary Kate, & Caroline
But she's got lots more kiddos at home still, and these three lovelies round out the female contingent of their tribe. When my kids (and I only have 4) were younger, Becca and I were both home schooling. She is still in the thick of it with the last 4 or 5 children, but mine are all out of the house and in college or married. Our families have known each other a long, long time, and I love that these girls wanted to come and hang out with me while their parents were out of town. We had a little sleepover and had some fun learning new things. I felt like a home school mom again! I guess in a way, I was their substitute teacher for the day.

When they arrived, it was close to dinner time, so we commenced making pasta. With me, everything is a learning opportunity (our home school motto was "Always Learning!" and we were constantly repeating that phrase, much to our children's chagrin, I'm sure) so I thought making pasta would be a fun and practical way to make dinner together. I've written about making pasta several times on this blog, so I won't go into the details, but just share these fun photos of our floury adventure.

Mary Kate learned some knife skills and helped make a filling. Ellie and Caroline became pretty adept at shaping, filling, sealing and cutting ravioli and tortellini.


Bedtime, and 8-year-old Mary Kate made herself a little perch, like the princess that she is. No fear at all about sleeping in a new place, in a big bed all by herself! She just got out her Bible, set a lamp on the bed and settled herself in. In the morning, she made up her bed and left the room spotless. I noticed that she enjoyed most of the treats in the "Welcome" basket, too. ;)


In the morning, we had breakfast together, and started working on a little bit of schoolwork. It was mostly fun, though, and we decided that we covered the following subjects:
  • Home Economics (pasta making, knife skills, crochet lesson)
  • PE (we walked around Pittsboro from our lunch venue to the building permit office in the COLD)
  • Math (we had to calculate the egg-flour ratio per person)
  • Writing (I had the girls write guest posts for this blog about their experiences - see below!)
  • Creative Arts (I am getting ready to start construction on a new home for our neighborhood, so Caroline, Ellie and Mary Kate each made a plan for the exterior finishes, choosing siding, windows, stone, roof shingles and paint colors)
  • Italian (we discussed culture and language and learned a few new words like macchina di pasta, al dente, and molto bene! As you will see below, the concept of al dente - 'to the tooth' made a huge impression!)
Here is what the girls had to say about making pasta:

"I didn't think making pasta was so fun if you don't know what you're doing. Having Mrs. Metty guide me and my siblings through all the steps made me enjoy cooking so much more. I loved making the dough for the pasta and putting it in the pasta machine. The best part was eating it! It wasn't crunchy or soggy but just right! I don't think I have ever eaten better pasta before!"

"My favorite thing about making pasta was sending the dough through the machine. It took a while for me to get it right but soon it got more fun. The ravioli was really fun. I liked the part when you wrapped it up in the dough. It tasted fantastic especially when Mrs. Metty put the oil on it. I am soooo glad I got to make it with Mrs. Metty. She is such a good cook." (aw, thanks!)

"My favorite thing I liked about making pasta was that the ravioli was sweet and noodle-y. The thing I liked about the pasta was it had a little bite to it and it was just so, so good. All of it was so good."


I have a chalkboard wall in my bonus room and invited the girls to clean it up and leave a new message...I love what they decided to write! 

I loved getting to know these three darlings just a little bit more on this visit. I feel like their Auntie, and they have enriched my life!


Saturday, January 17, 2015

Becoming Nana


Everything they say about it is true...being a grandmother is pretty great. I'm new at this, since December 10th, but so far I'm quite smitten with that little bundle of joy, that warm little loaf of bread. Tiny Esther is just perfect, and she loves to be snuggled and she hardly cries, and it's all just delightful. I've been blessed to have visited with her for 3 out of her 5 weeks of life, and I'm missing her like crazy now that I'm home.

 She slept through her first bath, and then
promptly pooped in her clean towel! 
Tiny delicate perfect fingers... 
...and toes!
These first few weeks have been pretty challenging for Abby and Dave; Esther's been a champion sleeper, pooper, eater and all-around A+ newborn. But her entrance into this world was anything but smooth. Abby had a long labor, and 5.5 hours of pushing, only to have an emergency situation at the very end with a ruptured umbilical cord and hemorrhaging. The midwife literally saved her life. She's had to be diligent about fluid intake and rest because of this trauma and all the demands of labor, delivery, postpartum care and breastfeeding. The emotional toll on Dave has been rough as well, as he stood helplessly watching as his wife began to lose consciousness and his baby's life was in danger. We all thank God daily for sparing Abby and Esther's lives, and bringing them home to be cared for, safe and sound. Dave's doctor/nurse parents are so wonderful and cared for Abby, too, checking her blood pressure and watching over her very carefully those first few days.

Because of all this, I couldn't wait to get out to Seattle and do whatever was needed for them...it was pure joy to tiptoe into their room early each morning when Dave texted my cue, and take Esther for some Nana time. We sat together and sang, prayed and chatted about life for a few hours while Mama and Daddy slept. Then I'd change her diaper, place her in her mother's arms for a feeding, make breakfast, and do some laundry. When Abby got Esther back to sleep, she'd get up for a few minutes and I'd change her sheets and make their bed so she'd have a fresh place to spend the day - total bed rest for over a week, midwife's orders! I spent long hours sitting with Abby and Esther on her bed just talking, rubbing her feet, watching Jimmy Fallon videos and just having a lovely, restful time getting to know the baby. I put away lots of baby gifts, re-arranged the abundant food from friends in the frig, went to the grocery store and brought lattes and pastries back from the local coffee shop. I even walked Butter a few times...but she was a turd most of the time. She even had the nerve to strain her ACL (can that even happen to dogs???) on a run with Dave, and we had to send her to Bestemor's house in Anacortes to recover without being all up in the middle of Abby's recovery. Bestemor and Farfar...that's Norwegian for Grandma and Grandpa Stalsbroten. :)


I took a red-eye December 23rd, staying a few more days than planned because Abby just wasn't up and around yet, and arrived home in time to hit the ground running on Christmas Eve. My family here made sure to have all our traditions in place, taking over all my 'duties' to make it special. I just love them all. My husband and youngest daughter and I were able to return to Seattle to celebrate Esther's dedication to God at church last week. If course, they are in love, too. J-Nasty and The Guvnah, apparently. We'll see. 


I sewed a dress for Esther's church dedication service, made from pieces of three wedding dresses: Abby's, Dave's mom's, and mine. It was a special weekend with the extended family and so great to see that Abby was up and around and almost back to her old self. Esther is a much loved baby, with a wonderful heritage of family. She is named after her paternal great-grandmother, who was an incredible woman, missionary and overcomer. 
Everyone commented about what a superwoman Abby was through that lengthy childbirth experience. She did it all without any drugs, and even endured a life-threatening situation like a champ. I am so, so proud of her, of the amazing woman she has become, and I admire her greatly. She has been so faithful to take care of herself, so she can take care of her baby, and has obeyed midwives' orders religiously. She is a great mom already! And it is sheer joy to see what a loving father and husband Dave is. I feel full to overflowing when I see how God has taken care of my family in so many ways.

Nana, Mama and Esther


Wednesday, December 10, 2014

The Sisterhood of Motherhood

My lovely darling firstborn has been in labor all day to bring their first baby into the world. A girl, whose first name begins with an "E" and that's all I know. She will be our first grandbaby, and we couldn't be more thrilled.

Of course, I've been thinking about Abby all day, about my own labor bringing her into the world, and wishing I could be with her, help her through it, relieve her of the pain, and experience it up close and personal...not that she would want me that close! I just received a text from her husband that she was in transition and it's been about 15 hours since her water broke at bedtime last night. He said she had gotten sick, which is normal at this stage of labor, but I hate that she is having any discomfort...I feel like that 1960s expectant dad who paced the floor of the maternity wing waiting room!

As I took a walk this morning, I was pondering this life transition for Abby. She will soon join me in the Sisterhood of Motherhood. She will understand things about me that only a mother can understand. What it's like to brave the likes of labor and delivery to bring a precious little one into the world. What it's like to have such a strong love and sense of protection over the tiniest, most beautiful human being you've ever seen. To know that only you can give her what she needs. To feel the most intense sense of responsibility and a love that can actually hurt. And the huge boost in self-confidence she will experience knowing that she did this. She beasted the pain and pushing. That baby girl will need Abby like nobody ever needed her. We will share that same level of emotion, a hard won accomplishment of labor and delivery.

I know that shortly, there will be a call that it is all over, and Baby E is in Abby's arms. But gosh, the wait!


UPDATE: Esther Natalia was born at 9 pm last night, after a long, difficult labor. But she is perfect and nursing like a pro. Now is time for rest, rest, rest. I will leave tomorrow morning bright and early to spend 10 days with them...Can't wait to snuggle them and cook lots of amazing meals for them!

Sunday, December 7, 2014

Updates on a Budget


I guess the blessing and curse of being an interior designer, is that you want to keep up with the trends, and you...WANT TO KEEP UP WITH THE TRENDS. This translates into a thorough 'out with the old, in with the new' compulsion about every 5 years or so. We are not fabulously wealthy, so I have to tame the beast when it comes to satisfying the urge to bring a fresh look into my home so frequently. But I do find that my interiors start to look dated, especially when it is my occupation to build homes that are stylish and appealing to a wide range of buyers. I am constantly perusing Pinterest and blogs for light fixtures, cabinets, flooring, paint colors, etc. and it just whets my appetite all the more about my own home. I sometimes hate that about myself, especially when I let my brain settle down and start thinking about a more global perspective on priorities...

But alas, we have been in our home for almost 7 years now, and it was time. I was up for the challenge of changing things up on a budget, so I rearranged some of my stuff and created a fresh look on the mantel and then tackled a few rooms and projects slowly, making use of thrift stores and large doses of elbow grease.

First up in 2014 was our master bedroom. I painted the walls a warm neutral called "Latte" (Sherwin Williams 6108) back when we built the house, because I knew it would provide flexibility with any future changes. In addition, I always keep white/off white bedding on hand, and just change up the rest. I wanted to bring a serene, neutral palette to the room that invites us in to relax. For about $250, I did the following:

  • Stained two antique sewing tables from my favorite thrift store with a quick swipe of Rustoleum stain in "Driftwood." I just painted it on, and lightly wiped it off. I replaced the wooden knob with a cute $6 dangle pull from Anthropologie in aqua. These became my bedside tables. (I did something similar to a cherry chest of drawers.)
  • I bought two lamps on sale for about $15 each from Lowe's that were the shape I wanted, but I didn't like the base. The glass had been painted from the inside so I swished a LOT of nail polish remover around and wiped it with a paper towel. This gave me clear glass bases, which I covered with cute fabric lampshades. 
  • Two throw pillows from Home Goods, one in gray, and one in pale aqua (down filling only, please) and a cotton cable-knit throw from Ikea completed the bed. 
  • Using a small swatch of leftover fabric from another project, I recovered a small bench, and a yard of a cotton velvet was enough to make two tiny pillows for my little white boudoir chairs. 
  • My big splurge was to replace my ceiling fan/light. Although I hated to lose the fan capability, I figured if I was really dying at night, I could always add a small fan on the floor...but I really wanted a beautiful light hanging from the ceiling with a dimmer switch. It brought a touch of elegance to the room, and soft overhead lighting. 
  • Lastly, I added a simple sheer scarf draped over the existing curtain rod to just soften the lines of the window, and let all that natural light in.

Several months later, the next project was an extra bedroom on the second floor. We had painted this room bright green when we moved in and filled it with black and white accents, and although we all loved it 7 years ago, it was time for a relaxing change. Looking for a gray/khaki/white/gold combo with very few subtle pops of color. For about $200 I:
  • Painted the walls "Worldly Gray" (Sherwin Williams 7043). I have used this color in several of our new constructions, as it is a warm gray and works with just about everything. 
  • Spray painted several accent pieces gold: candle holder, few picture frames, metal wall hanging, and some brushed nickel drawer knobs for the existing white dresser. 
  • Bought a pillow with gold sequins at Home Goods for the bed; again covered in white/off white bedding. 
  • Covered an old fabric headboard with a furry twin-sized blanket...this was enough to cover a queen sized headboard. Just wrapped it around the existing fabric, and stapled it on the back. 
  • Made a pillow with some scrap fabric. 
  • Scrounged around my 'stuff' and found some quiet prints framed in gold frames. As well, I found some black and white drawings and photography framed in black. 
  • Brought a beautiful bassinet up from storage for my new little granddaughter coming any day now! 
BEFORE:
    

AFTER:


Lesson learned: Often you can update your rooms with a can of paint and a ruffle through your stash of family photos and pictures. I am not a pack rat, but I do understand that trends come and go, and if I just hang on to a few things, they will come back around someday. Who knew that gold/brass would come back to haunt us? I've even seen antique brass door knobs in stores recently! Noooo!!

Our home is designed after the beautiful villas we had seen while living in Italy, and part of our original plan was to install rough hewn beams in our kitchen ceiling. But we never got around to it, until my talented and industrious husband decided to go for it a few weeks ago. It was precarious at times, but we did it together and had lots of fun and near disasters! Materials cost a mere $150, wood and stain. 


As the baby's due date approached, I found I had this nesting instinct to get my lingering projects done and installed...even though I am the Nana, not the Mama! I had a really cute antique chair that I found at the thrift store for $5 that needed new padding and fabric (extra I had in my stash) and a quick coat of paint. 


And I really wanted to update my lighting without getting new fixtures. What to do? What to do?... I decided to try making a lampshade that would fit over the curvy lines of my very traditional breakfast table chandelier. For a first attempt, I am rather pleased with the way it looks. I will do a few things differently next time, but I learned a lot of lessons along the way. 
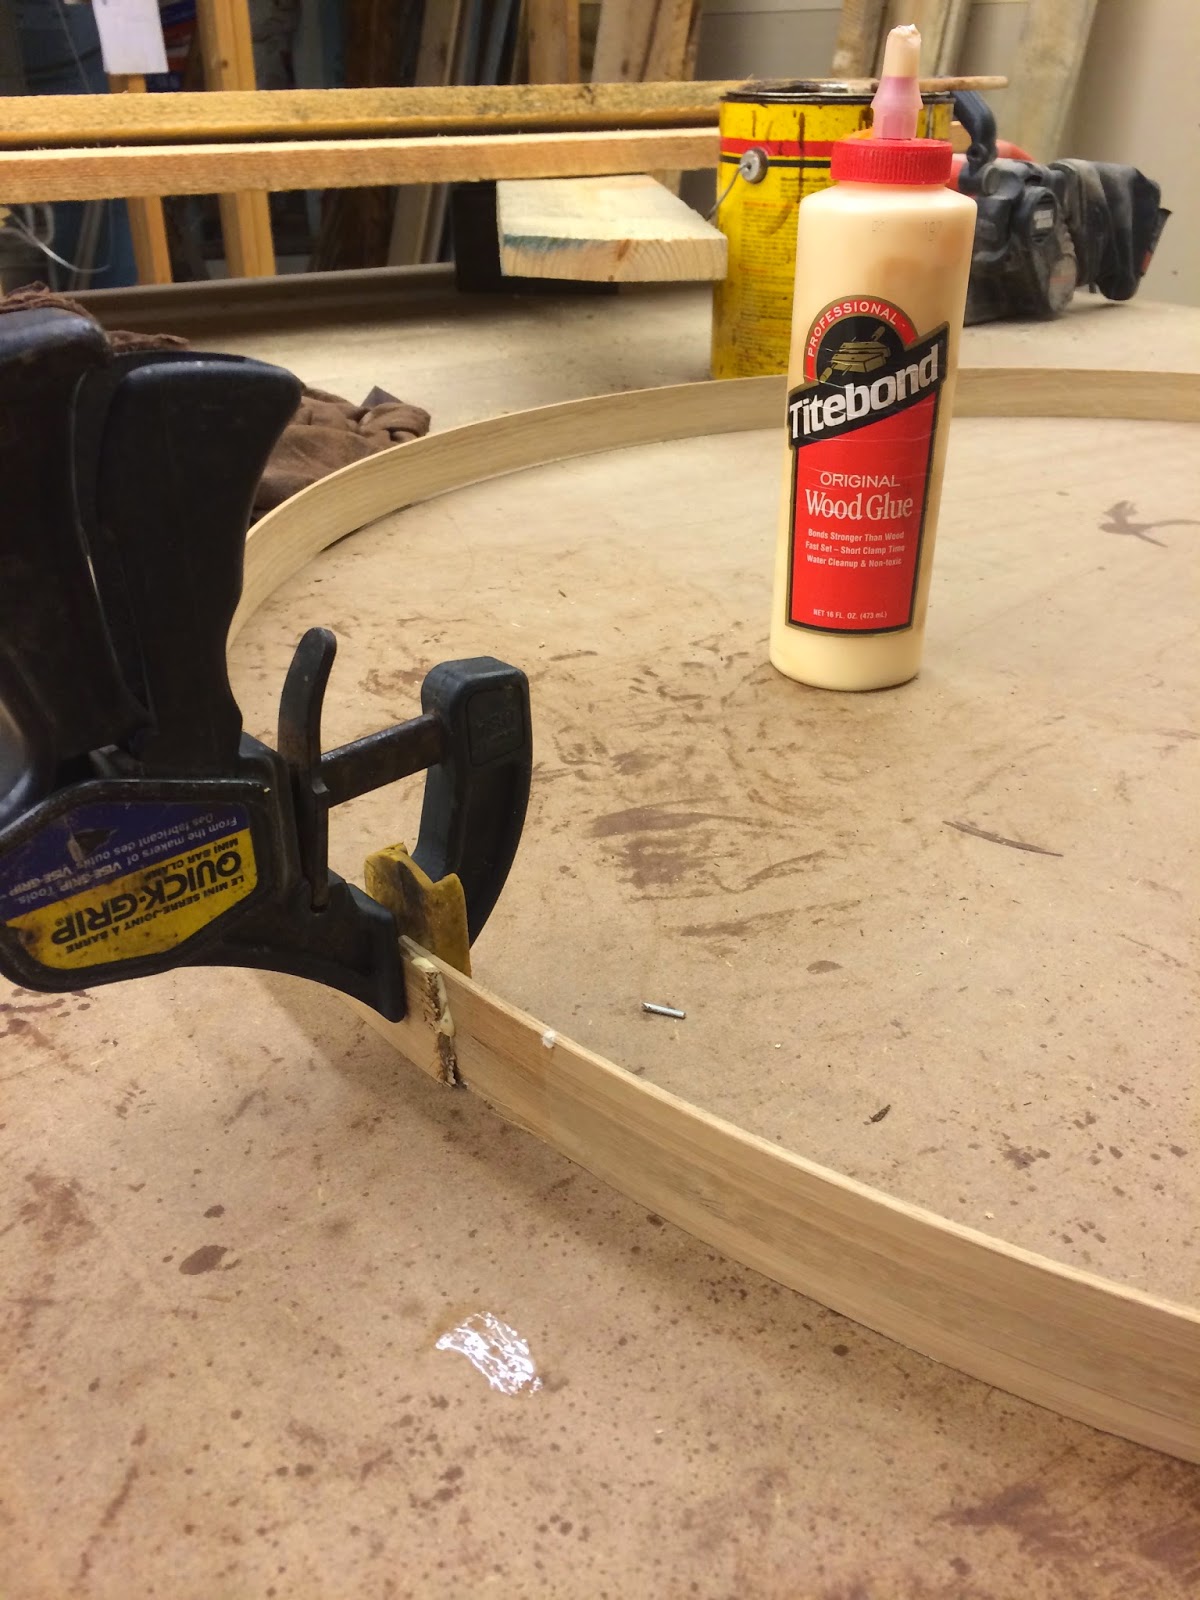
  • I ordered an 80' piece of bamboo edging (1"x1/8") that came in a roll from a seller on Ebay for $20 (figure I can make some more lampshades!). Calculating the circumference I would need, I cut the bamboo on a chop saw and glued it into 2 equal circles and let it dry while clamped. 
  • Using poster board, I cut pieces in the width of what I wanted the shade's height to be. For this 27" diameter fixture, I made the shade 14" tall, and 29" in diameter. I removed the top level of bulbs (the fixture originally had two levels of lites, 6 on the bottom and 3 on the top). The poster board was glued and clamped to the two hoops with clamps.
  • Once dried, I hot-glued a length of fabric in the same manner and covered the rough edges on the interior of the shade with binding tape in a similar color. 
  • Now the tricky part was to determine how to actually hang the shade on the fixture. I decided to create a triangle of bamboo edging glued together that could rest on the three candelabra bases where the bulbs had been removed on the top layer. The triangle then rested on the 1/8" thickness of the bamboo edging on the inside of the shade...not super secure but since (most likely) no one will be swinging from it, it works. 
  

Now, come on Baby Girl! We are ready for you to arrive!